How to Get the Most Out of Billing
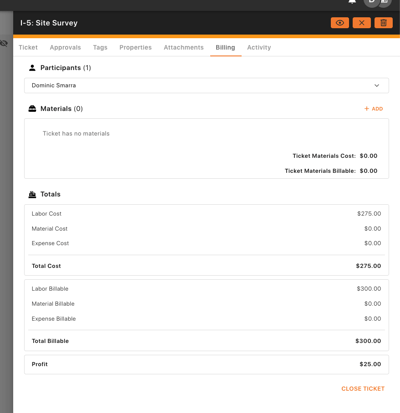
When adding Billing onto a ticket, you are able to get a breakdown of how much each individual part of the process cost as well as tracking cost vs billable expenses. In order to view the Ticket Billing a ticket must be in the Completed Status and have a Project assigned to it.
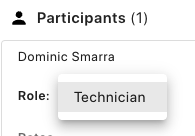
Once on the billing tab, the participants Role must be selected. These can be set in the Job Roles section in the Admin Panel.
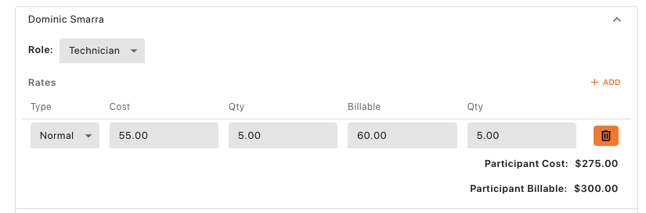
After the Role is assigned, a Rate can then be added. The Rates will be added in the same way that they are shown under the Job Role. If a minimum is not set, the quantity will show as zero. These values need to be manually updated based on actual time.
Materials and Expenses can also be added to the participants individually to show use based on participant, if multiple are on the same project.
Materials can also be added onto the billing independently to indicate their use on the job. These can be added from the Materials list once they are created in the Admin Panel.
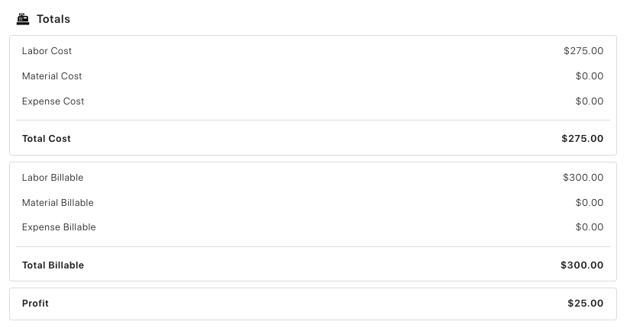
Once all participants, expenses, and materials are added, they are shown at the bottom of the billing tab under Totals. This will break down the individual cost vs billable expenses into Labor, Material, and Expense costs and show total profit based on those values as well.